 RSS Feed
Improve the performance of graphics card to view images more powerful. To overclock the card (card) VGA more readily than to overclock the CPU (central processing unit) or processor. You do not need to open the PC chassis to do so. Usually the vendor provides a VGA options tweaks on the driver or VGA overclocking tool that can be downloaded from the site on the internet.
When the driver VGA card for your PC does not provide the tools and tweaks to the website vendornya not overclocking tool, there are still other ways, namely by using free software on the Internet. One of the software that can be used is Powerstrip.
STEP 1
Open your Internet browser and type www.entechtaiwan.com, it will open a web page. Look for the downloads. Where there are three types of files Powerstrip 3.8, which can be downloaded, select the English Shareware size 1.4 MB. After that, specify the location of the installer file storage Powerstrip in the hard disk drive. The process of downloading will be running, and seselesainya, do the installation program.
STEP 2
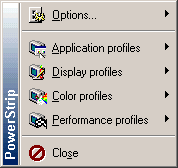
After the installation and setup process is completed, the icon will appear on the Windows Taskbar Powerstrip, precisely in the system tray. Right-click the icon and it appears the pop-up menu. Information about the hardware can
You go by clicking [Options]. Then open the [Display profiles] [Configure], in the box Display profiles, there will be some color settings, resolution and refresh rate. Arrange the color by clicking the drop-down menu on the Color Depth, to increase the resolution of the slider. Refresh rate monitor can also be increased by clicking the drop-down menu and select [standard discrete timing], and slide the slider. Try changing refresh rate does not exceed the maximum capacity of the monitor. Afterward, click [Apply] to see the strength, and click OK.
STEP 3
In Powerstrip box, click [Performance profiles] [Configure], and will open a new box. Here are the slider Memory Engine clock and clock. Click the right mouse on each slider, the information will appear on the clock. Engine clock is the processor on the graphics card, while the memory clock speed is provided to support the memory performance graphical processors.
STEP 4
Increase the memory clock before you change your clock with its engines. For example, slide the slider to increase the memory of 2 MHz and then click [Apply]. But a warning box will appear when the form count for 10 seconds. Press OK when you select a new setting, or keep the memory clock with the default settings by pressing NO. When selecting NO, the monitor will be black (flicker) for a few seconds, and back to normal again. This box is very functional, because if an error screen, the recovery will be running.
STEP 5
Next, try to increase the clock speed of memory gradually 2 MHz, click [Apply], and, and see the changes that happen on the screen. So forth. If the image on the screen to appear broken and dots that caused the desktop picture is not smooth, then down memory clock speed does not appear again until the problem is.
STEP 6
Try to increase the speed limit to the memory of not more than 20 percent from the initial position memory clock. For example, only the initial 160 MHz memory, to increase the maximum limit of 192 MHz. It should be below that figure, and run a PC system for several days. When no means a problem, you can increase the speed of memory again.
STEP 7
Change the engine clock does not actually improve the performance of the display, but also by the increase, the graphics card stability can be maintained. When the clock speed of memory plus, the engine clock must also be improved. Try to raise as much as 5 MHz. Look first digit equilibrium between the engine clock speed with memory clock. Do not raise the engine clock drastically, because it will aggravate the performance of graphics card.
STEP 8
Click [Color profile] [Configure] to open the box color settings. You can change your own Gamma, Brightness, contrast, and Temperature. Then click [Apply] to see the outcome, and click the [OK] to why.
STEP 9
After all finished, restart the PC and do go to the program Dacris to mengujinya him again. You can test the speed of memory, processor, hard disk, 2D video, CD / DVD, internet, printers, and network.
Normally
Before overclocking both the VGA card, use the program to test him 2D and 3D, such as Dacris him (www.dacris.com), Dr. Hardware him (www.dr-hardware.com) or Sysmark him (www.madonion.com). Look capability that is able to be given the maximum VGA card for your PC. Record the value provided, and after a graphics card with enhanced capabilities Powerstrip, measure return with him to use the same program. Perbandingkan results before and after the process of overclocking.
Source :
from Belajar Gratis with the title VGA card overclocking with PowerStrip
Jangan lupa tinggalkan ya.

0 komentar:
Post a Comment